Submission Stages
What are Submission Stages?
Submission Stages are the stages a submission will progress through as it is completed and reviewed. These are fully customisable and many features can be automated.
For example a submission may start life as a Draft, then be Submitted. At which point you might choose to Accept it, Decline it, request it to be Reworked, or Waitlist it for the future. Each of these bolded words is a Stage.
We provide some default flows that we know our customers find useful. Starting from there you can, if you wish, make changes from small language tweaks, to creating an entirely custom workflow.
If you would like assistance with using Submission Stages then please reach out to support and we will work with you to understand your process and work with you to find the best configuration for your event.
How do I get started with Submission Stages?
When you create a new Submission Flow, the workflow you selected will determine the default Submission Stages. To view these, navigate to your >
Outlined below are the default Submission Stages for each workflow.
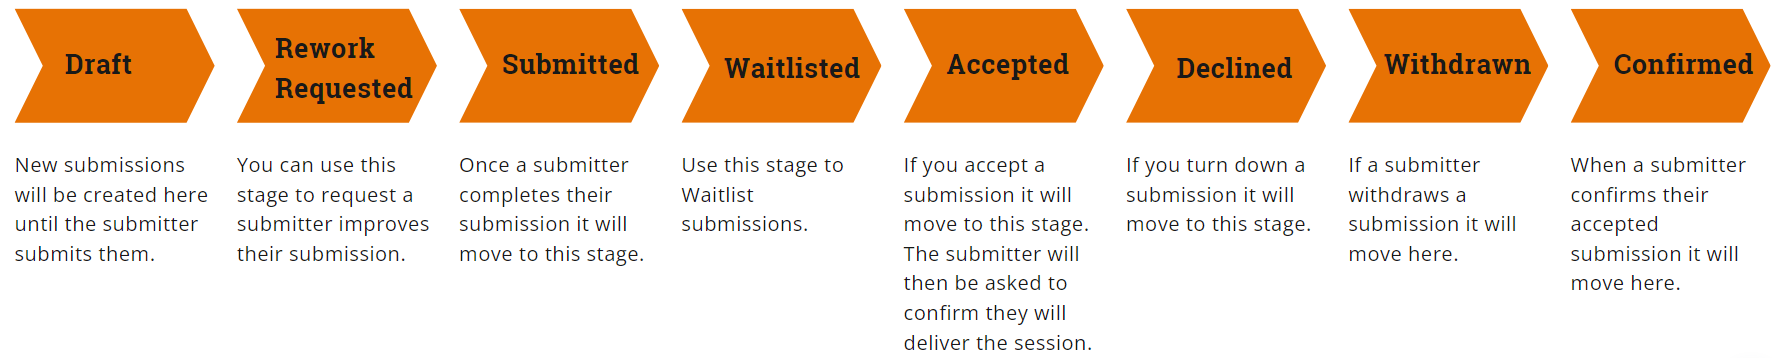
Open Call For Papers
The Open Call For Papers Workflow will generate the following Stages:
Invite Speaker Details
The Invite Speaker Details Workflow will generate the following Stages:
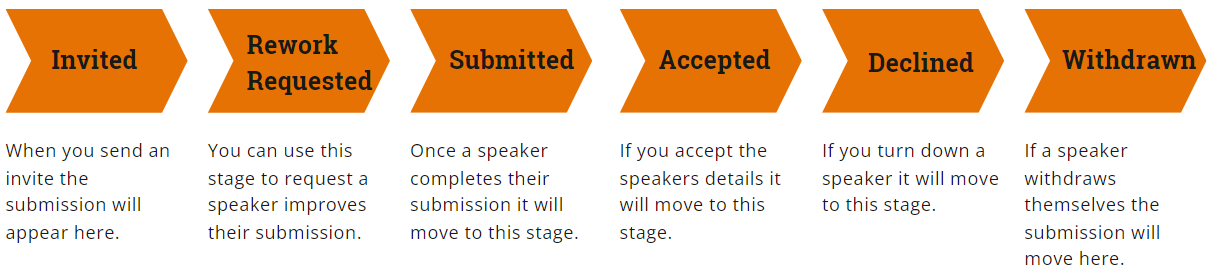
This is a simpler flow than the ‘Open Call For Papers’ options and, by default, will only allow speakers you have invited to provide their details.
Custom
If you choose ‘Custom’ you will be presented with a wizard that will ask you a series of questions to help understand your workflow. It will then create Stages based on your answers.
The wizard changes based on our customer needs so the individual options are not documented here. Just give it a go, each question should be clear. If not, just ask!
Can I rename a Stage?
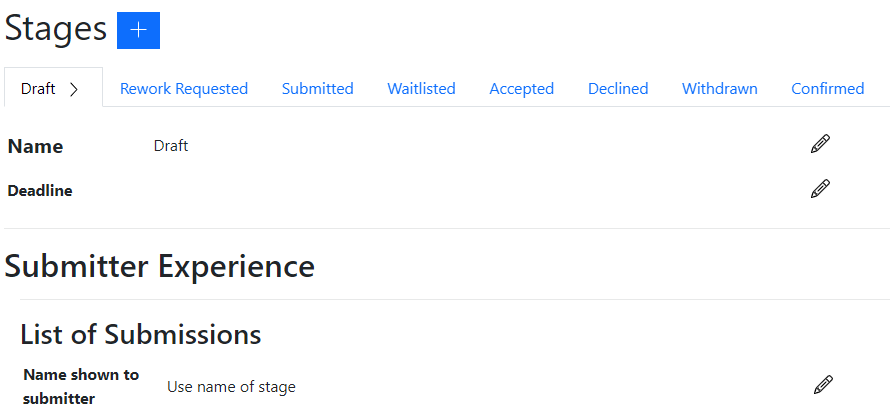
Of course! Navigate to the Submission Stage you wish to rename and edit the ‘Name’ field.
If you would like to show a different name to the submitter then you can also change the ‘Name shown to submitter’ field.
This can be useful, for example, if you have an stage called ‘Only if desperate’ but would rather show ‘Waitlisted’ to the submitter.
How do I add a new Stage?
Navigate to Submission Stages and click the blue plus button next to ‘Stages’.
You will be asked to give the name and an optional deadline for the new Stage.
You have the option to copy an existing Stage or start from scratch. We recommend you copy a stage that serves a similar purpose to the one you are creating. This will give you more of a starting point for configuring the new stage.
How do I reorder Stages and does the ordering matter?
To reorder a stage, navigate to the Submission Stage you want to move and click the arrows to move the stage left and right.
The ordering does not affect anything, it is purely visual, feel free to adjust them to whatever makes sense for your event.
How do I set deadlines for Stages?
Each stage can have its own deadline. There are two ways to set there:
- Navigate to the Submission Stage you wish to set a deadline to and edit the ‘Deadline’ field
- Navigate to Publish Flow menu item where you will see a list of your Submission Deadlines
For more information about Deadlines, see Submission Deadlines.
How do I delete a Stage?
To delete a stage scroll to the bottom of the page. There are a few pre-requisites to deleting a stage, these will be shown to you. Once you have addressed the issues click the ‘Delete Stage’ button to delete the stage.
Stage Sections
What is the ‘Submitter Experience’?
There are two customisable parts to the Submitters Experience.
- List of Tasks - This is what the submitter see when they look at the list of submissions they are associated with
- View of a Submission - This is what the submitter sees when they look at an individual submission, both before and after the deadline
What does the submitter see when looking at the List of Tasks?
Navigate to the Submission Stage you wish to edit and you will see several options under ‘List of Tasks’, as well as a mock-up of the settings you have configured:
- Name shown to submitter - This is the name of the stage that will be shown to the submitter
- Does submitter need to take action - Yes/No as appropriate
- Button on submission - Set the text and colour of the button
What does the submitter see when looking at the ‘View of a Submission’?
A key component of Submission Stages is the ability to change what a submitter sees depending on the current Stage of their submission. To configure their view, navigate to the Submission Stage you wish to edit and scroll to ‘View of a Submission’ where you will see a fake browser that shows a mock-up of what a submitter will see both before and after the deadline.
To add things to the page, click ‘Add Group’. This will add a simple group with a single button. Hover over the section, where you will have the option to move, edit, add new items and delete the group.

Editing a Group - Plain vs Featured
- Plain - This is a basic configuration of the Group, with a plain white background and basic buttons
- Featured - This is a more configurable Group, where you can select a colour to hightlight the Group and add Display Rules to buttons
For example here is a ‘Featured’ group set to ‘Column’ layout containing both text and button items.
Editing a Group - Text & Buttons
Hover over the button or text, where you will have the option to move, edit, add new items and delete the group.
Editing the text is straightforward. You can either use a formatted editor, or if you prefer you can use Markdown formatting.
Editing a button lets you configure both what the button looks like, and what it will do when pressed. You can add these actions to be performed when a button is pressed:
- Move Submission To State - This saves the form and moves the submission to a new state. This triggers any emails and any automation you have configured (see below for more on that)
- Save and Exit - Saves the form and returns the submitter to their list of submissions
- Exit without Saving - Returns the submitter to their list of submissions without saving the form
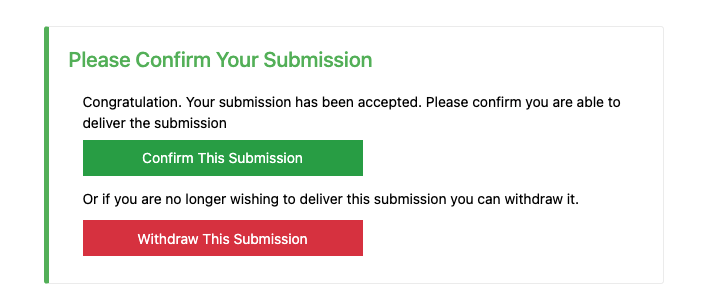
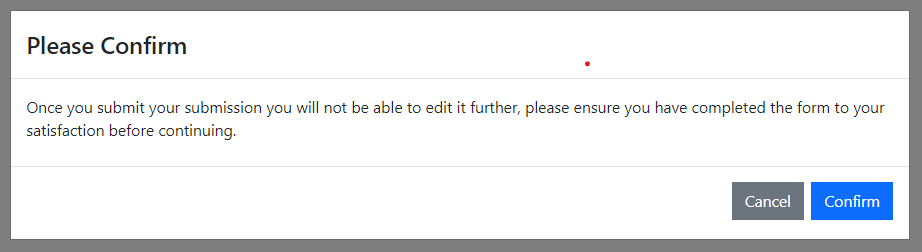
- Show Popup - Shows a Popup, this can be useful to ask the user to confirm before submitting or withdrawing their submission
What does the toggle ‘Require form to have valid answers for button to be pressed’ do?
When this is enabled the submitter can only click the button when they have completely filled in the form. For example, if the button is used for ‘Submit Final Entry’ this toggle should be selected. If the user presses the button the form will be validated and the submitter guided to complete any missing or invalid answers. If the form is valid the ‘When pressed perform these actions’ will happen.
If the button is ‘Save for Later’ then this toggle should not be enabled, this allows the user to submit a partially completed form.
For questions that are not mandatory the effect the toggle has is to ensure that if a value is filled in that it is a valid value.
For example, if a field ‘Website URL’ is marked optional then:
- If the toggle is enabled: The user can press the button when either the field is empty entirely (i.e. the user has not answered it) OR the field has a valid value (e.g https://example.com)
- If the user has input something like ‘my super website’, then they cannot press the button.
If the toggle is disabled. The user can press the button regardless of the value in the field. That said, their invalid value will NOT be saved to the database.
What is a Popup?
A Popup is a dialog box that displays over the submission. You can use this to ask the user to confirm their action before performing it. To create a Popup, click ‘Add Popup’. They are configured in the same way as the Groups on the page, hover over the Popup to see the buttons and to add content.
How do I configure emails for a stage?
Emails can be ‘Triggered’ when a submission is moved into a stage or ‘Scheduled’ to all submissions in the stage at a specific time.
For each email you configure, you can send it to:
- Submitter
- All Team Members
- Specific email addresses
You can add multiple emails, sending different ones to different people. For example the default ‘Submitted’ stage send an acknowledgement to the Submitter and a notification to All Team Members.
You can add a scheduled email to automatically nudge Draft submissions to complete their submission. For example, you may want to schedule an email to notify submitter that there is one week until the deadline date, then again when there is one day remaining.
For more information about emails, follow this link.
What is Automation?
In the Automation section you can configure actions to happen automatically when a submission moves into or leaves a stage.
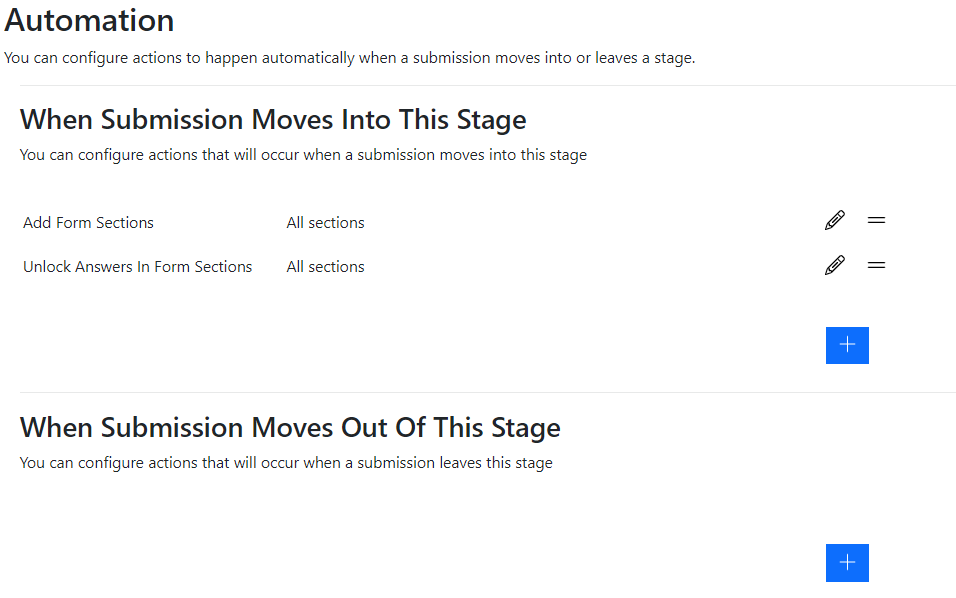
The actions occur regardless of who initiates the move, either the submitter or the event manager.
You can automate the following things:
- Add Form Sections
- Hide Form Sections
- Lock Answers In Form Sections
- Unlock Answers In Form Sections
- Add Lables to Submission
- Remove Labels from Submission
- Create/Update Agenda Items
For more information on Submissions & Labels, follow this link.
How do I manage the content on the Form Designer?
When a submission enters or leaves a stage you can:
- Add and hide form sections from the users view
- Lock and unlock answers the user has given
You can use this to progressively add more content to the form as the submitter progresses through your Submission Stages.
The default ‘Call For Papers’ flow adds all questions in the Draft Stage. It then locks all answers when the submission moves into the Submitted Stage. If you move the submission to Rework Requested the Stage has Automation to unlock all answers. They are then locked again when the submission moves back into the Submitted Stage.
How do I add labels automatically?
When a submission enters or leaves a stage you can:
- Add and remove Labels from a submission
For example you might want to add a ‘Needs Rework Review’ label to a submission when it moves out of the ‘Rework Requested’ Stage. You can then filter your Submitted submissions to see which have been reworked.
If you do want to separate out Submitted from Reworked submissions more clearly you can create a new ‘Reworked’ Stage by copying the ‘Submitted’ Stage and changing the ‘Confirm’ button on the ‘Rework Requested’ stage to move the submission to the new ‘Reworked’ Stage.
How do I add content to the agenda automatically?
When a submission enters or leaves a stage you can:
- Create or update agenda items
This will create or update the content in the Agenda Planner automatically. You can choose whether to update Speakers and Sessions, just Speakers, or just Sessions.
If you are creating content in multiple events you can also choose which event the content should be added to. If you need to add content to multiple events then create multiple ‘Create / Update Agenda Items’ actions.
It can take around 15 seconds for the updated content to appear.
What is ‘Agenda Appearance’?
When a session is created from a submission the agenda will track updates to the submission so you can ensure your agenda is up to date.
You can configure how the agenda responds to submissions in this stage. For example, if a stage represents declined or withdrawn submissions you can configure the agenda to show the session as having an error and to require the speakers to be removed from the agenda.
Still can’t find what you’re looking for? Email support@lineupninja.com and one of the team will get back to you as soon as possible.