Resources
What are Resources?
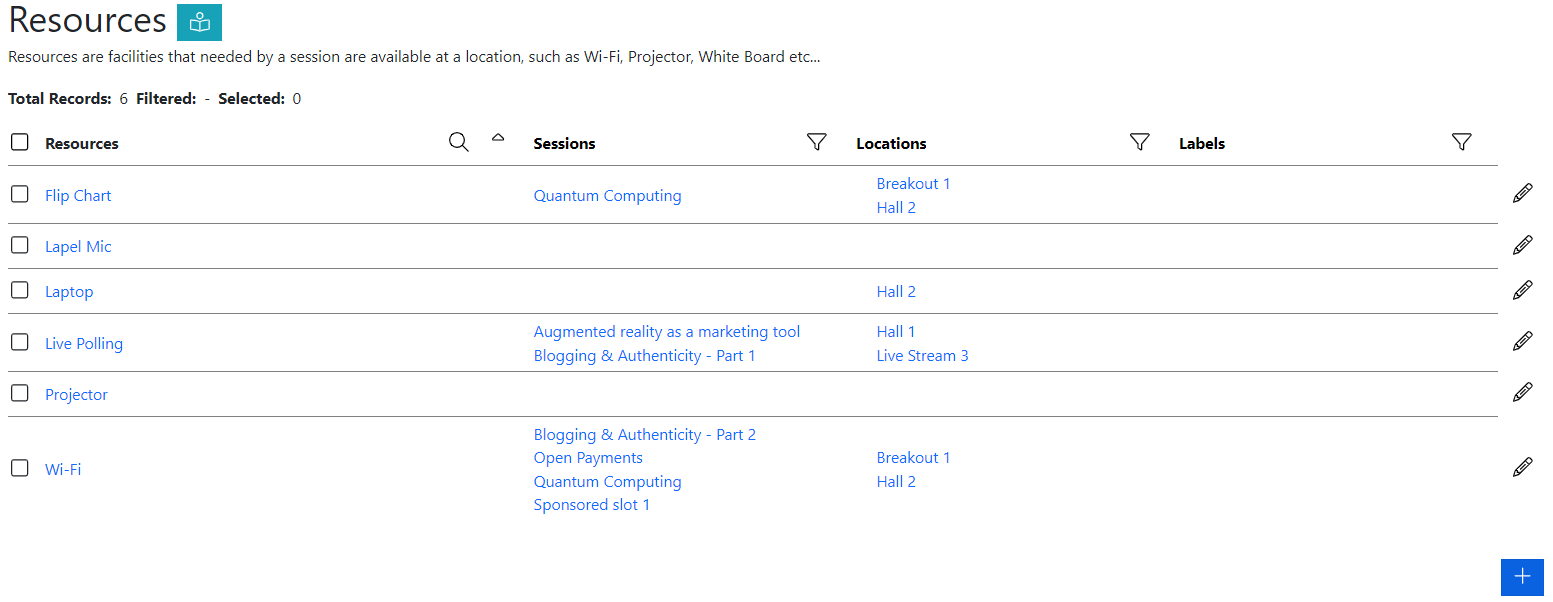
Resources usually represent physical resources that are required by a Speaker to deliver their Session. They may include things like a laptop, Wi-Fi, tables, chairs, whiteboard etc.
They are used to help you ensure that your scheduled Sessions take place in Locations that have the required Resource. For example, if a session needs a lapel mic then the Session can only be scheduled in a Location that also has a lapel mic Resource.
How do I create and manage Resources?
- Navigate to >
- To create a new resource, click on the right hand side of the screen
- Enter a name for the Resource
- If you have created , or , you can associate them with the new Resources here too
- To manage this Resource, navigate into the Resource by clicking on the name
How do I add Resources to Sessions?
- Navigate to >
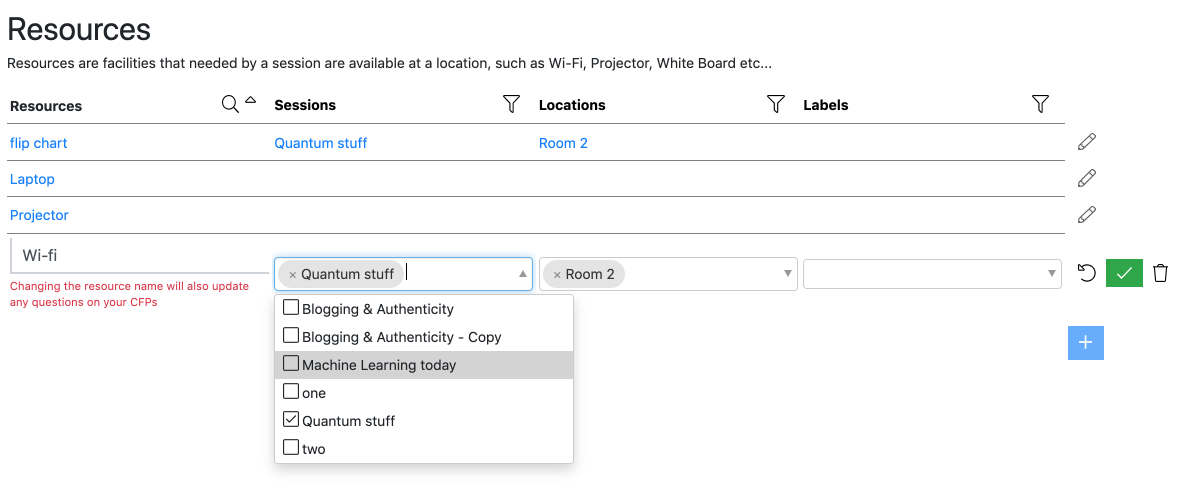
- Click next to the Resource you want to add a Session to
- In the Session column, you can search and choose the Session you want to add the Resource too
How do I add Resources to Locations?
- Navigate to >
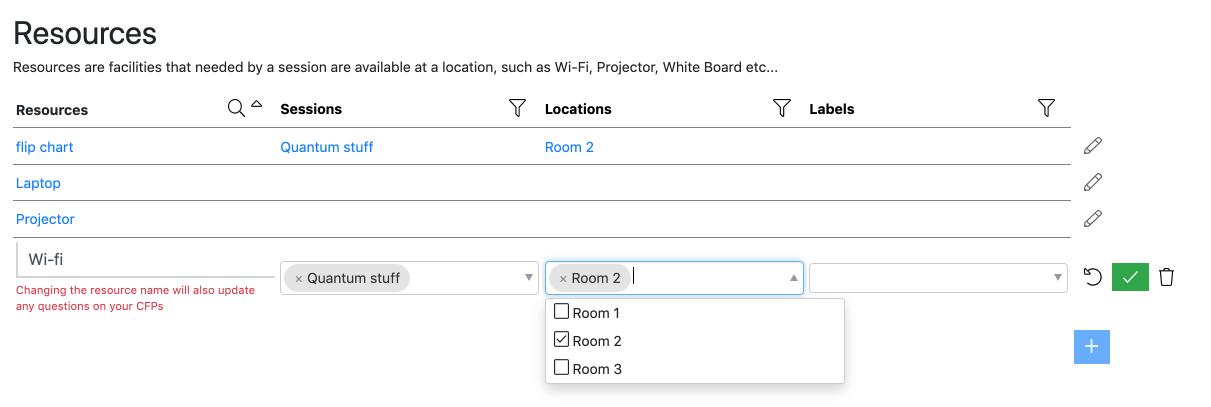
- Click next to the Resource you want to add a Location to
- In the Location column, you can search and choose the Location you want to add the Resource too
How do I add Resources to Sessions, Labels and Locations in bulk?
- Navigate to Agenda Planning and to the type of item you wish to add the Resource to. This will bring us the respective list view
- Tick the items you wish to add the Resource to
- Scroll to the bottom of the list, open the drop-down Action menu and click ‘Add Resources’
Do Resources have to be linked to Locations?
If you have a Resource that is available everywhere (for example, Wi-Fi) you have two options:
- Either: Edit the Resource and switch the option Schedule sessions needing this resource in these locations off. This will remove the scheduling requirement for the resource.
- Or: Add the resource to every location. Do this by editing the ‘Locations’ for the resource and clicking ‘Select All’
How do I limit the number of Sessions using a Resource?
You might want to limit the number of Sessions that require a particular Resource. This is particularly useful if the resource is consumable, say a license for service such as a production company. To set this limit do the following:
- Navigate to >
- Click on the name of the Resource you want to edit
- Edit the value for ‘Max Sessions’
As you schedule your event, Lineup Ninja will be checking to ensure that not more than this number of this Sessions are using this resource.
How do I limit the number of Sessions using a Resource at the same time?
You may have limits on how many times a resource can run at the same time. For example, you might only be able to provide 2 laptops at any one time.
- Navigate to >
- Click on the name of the Resource you want to edit
- Edit the value for ‘Concurrency’.
As you schedule your event Lineup Ninja will be checking to ensure that not more than this number of this resource are in use at the same time.
Next - Publish Agenda
Still can’t find what you’re looking for? Email support@lineupninja.com and one of the team will get back to you as soon as possible.