Gleanin
Lineup Ninja can integrate your agenda data with Gleanin. Their powerful speaker advocacy tools drive ticket sales for your events.
Create the integration
In Lineup Ninja, navigate to > and click the ‘Integrate’ button under ‘Gleanin’. This will create a new integration.
A dialog will be displayed, compete the requested fields:
Event Id
You can find the ID of your event on the ‘My Events’ page on your admin dashboard in Gleanin.
API Token
To generate an API Token go to the Gleanin admin interface, click your name in the top left and choose ‘My Profile’. You can then generate a key in the ‘API Tokens’ section.
Schedule Format
You can configure the format of the dates for your session to match your preferred style. Either choose one of the existing formats in the ‘Session Configuration’ / ‘Schedule Format’ drop down or choose ‘Custom Format’ to enter your own.
To specify a custom format you need to provide a template that describes the format. A session has a start time and an end time, you can format the display of both times.
This is best explained with an example. For a session starting at 09:15 and ending 10:35 on the 21st July in Eastern time and using
{% raw %} {{start:HH:mm}}-{{end:HH:mm dddd D MMMM}}{% endraw %}Will result im a displayed date of:
09:15-10:35 Wednesday 21 JulyUsing
{% raw %} {{start:D MMMM YYYY | hh:mm zz}}{% endraw %}Will result in
21 July 2021 | 09:15 EDTThe full set of options are
Token | Output |
|---|---|
Month |
|
M | 1 2 ... 11 12 |
Mo | 1st 2nd ... 11th 12th |
MM | 01 02 ... 11 12 |
MMM | Jan Feb ... Nov Dec |
MMMM | January February ... November December |
Quarter |
|
Q | 1 2 3 4 |
Qo | 1st 2nd 3rd 4th |
D | 1 2 ... 30 31 |
Day of Month |
|
Do | 1st 2nd ... 30th 31st |
DD | 01 02 ... 30 31 |
DDD | 1 2 ... 364 365 |
DDDo | 1st 2nd ... 364th 365th |
DDDD | 001 002 ... 364 365 |
Day of Week |
|
d | 0 1 ... 5 6 |
do | 0th 1st ... 5th 6th |
dd | Su Mo ... Fr Sa |
ddd | Sun Mon ... Fri Sat |
dddd | Sunday Monday ... Friday Saturday |
Week of Year |
|
w | 1 2 ... 52 53 |
wo | 1st 2nd ... 52nd 53rd |
ww | 01 02 ... 52 53 |
Wo | 1st 2nd ... 52nd 53rd |
WW | 01 02 ... 52 53 |
Year |
|
YY | 70 71 ... 29 30 |
YYYY | 1970 1971 ... 2029 2030 |
Y | 1970 1971 ... 9999 +10000 +10001 |
AM/PM |
|
A | AM PM |
a | am pm |
Hour |
|
H | 0 1 ... 22 23 |
HH | 00 01 ... 22 23 |
h | 1 2 ... 11 12 |
hh | 01 02 ... 11 12 |
k | 1 2 ... 23 24 |
kk | 01 02 ... 23 24 |
Minute |
|
m | 0 1 ... 58 59 |
mm | 00 01 ... 58 59 |
Second |
|
s | 0 1 ... 58 59 |
ss | 00 01 ... 58 59 |
Time Zone |
|
z or zz | EST CST ... MST PST |
Z | -07:00 -06:00 ... +06:00 +07:00 |
ZZ | -0700 -0600 ... +0600 +0700 |
How do I share Gleanin campaign links with speakers?
When publishing Gleanin the integration will request campaign links from Gleanin so that you can include these in emails you send to your speakers.
The integration will automatically create Custom Fields with the name ‘Gleain Campaign’ followed by the name of the campaign.
For example:
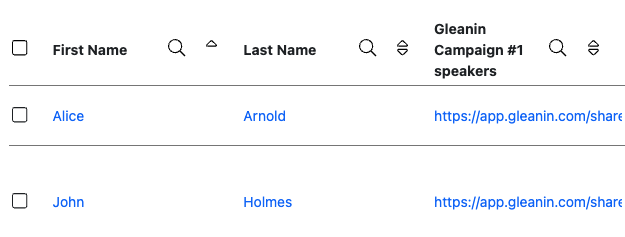
You can then reference these links in your emails sent to speakers. For example:
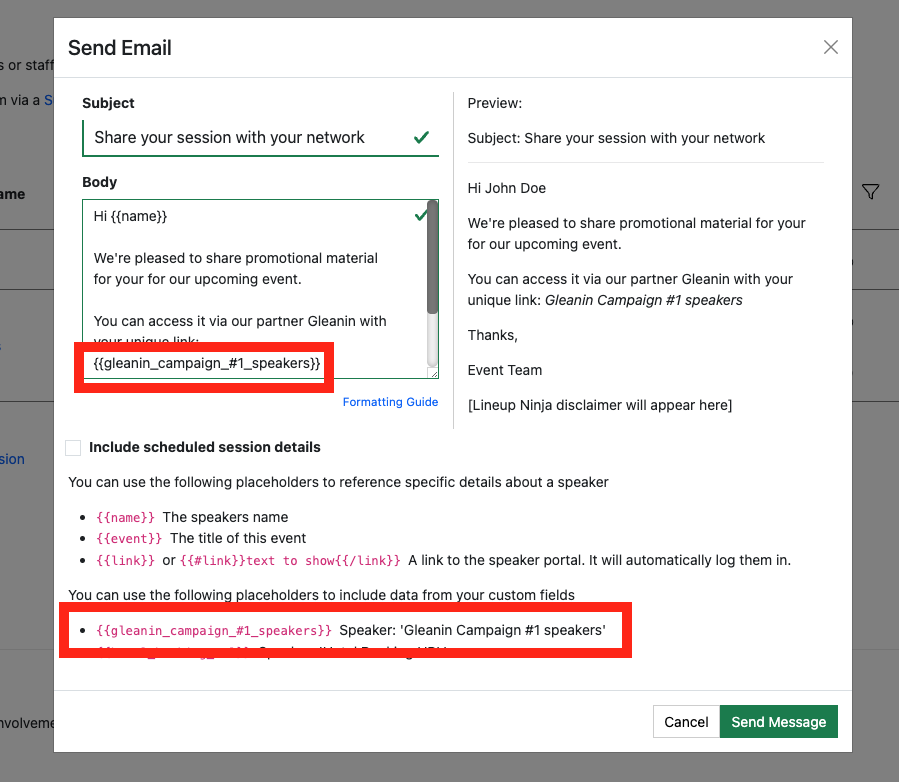
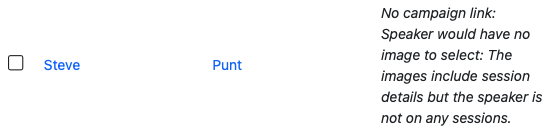
One thing to be aware of. In Gleanin it is possible for speakers to not have a campaign link for a particular campaign. For example if you target a campaign to a particular track / stream, then only speakers in that track / stream will have a campaign link.
When this happens, you will see a message like this where the link would be expected:
You can still email your speakers in bulk without worrying about the missing data. For example you can.
- Select all speakers, including those that might not have a campaign link.
- Compose your email and include the placeholder for the campaign
- Press send.
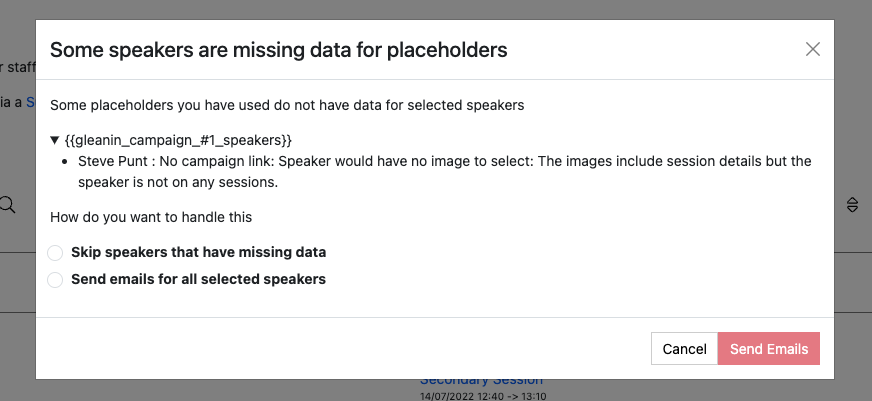
The system will then ask you how you want to handle speakers without a Gleanin link and you can choose to either skip them, or send the email anyway. For example:
Tidying Up Data
There are four options you can configure to automatically tidy up data in Gleanin when a session becomes unscheduled or deleted, or a speakers sessions are unscheduled or the speaker is deleted. If you need assistance with configuring these please ask.
Publishing your schedule
To update the speakers and sessions in Gleanin the schedule needs to be published. This will update the data in Gleanin.
To publish your schedule just click the ‘Publish’ button!
How can I filter the published content?
You can filter which Speakers and Sessions will be published based on a number of criteria. Some common use cases for filters are:
- Preventing ‘Placeholder’ sessions from being published
- Holding back a Speaker who is not yet ready to be announced
- Excluding sessions scheduled during the ‘build up’ day for the event
- Only publishing speakers who have confirmed their slot
- Removing a particular location, or track from the published schedule
- Anything you can think of using labels!
For Speakers you can filter in 3 ways
- Choose which speakers are to be published based on their relationship to sessions
- (If Speaker Confirmation is enabled): Publish speakers that have a confirmed session that is published and not filtered out.
- Publish speakers that are speaking on any session that is published and not filtered out.
- Publish all speakers
- Publish no speakers
- Apply more granular filters with labels
- Only publish speakers with a particular label. For example you might want to use a ‘Content Reviewed’ label to flag speakers that have had their content reviewed.
- Exclude speakers with a particular label. For example you might want to exclude a ‘Do not publish’ label to prevent publishing of speakers who are not yet ready to be published.
For Sessions you can filter in numerous ways
- Choose which sessions are to be published based on their relationship to speakers
- Publish All Scheduled Sessions. Publishes sessions regardless of whether they have confirmed speakers or not.
- (If Speaker Confirmation is enabled): Publish sessions that have one confirmed speaker.
- (If Speaker Confirmation is enabled): Publish sessions that have all their speakers confirmed.
- Publish All Sessions (available on Lineup Ninja Agenda App only)
- Apply filters with labels
- Only publish sessions with a particular label. For example you might want to use a ‘Content Reviewed’ label to flag sessions that have had their content reviewed.
- Exclude session with a particular label. For example you might want to exclude a ‘Placeholder’ label to prevent publishing of sessions which are not yet populated.
- Filter by location
- Only publish sessions in a particular location, or locations. This can be useful if you are publishing an agenda for just one or two locations.
- Exclude sessions in a particular location, or locations. This can be useful if you have scheduled sessions in your Green Room or similar back stage location.
- Filter by resource
- Only publish sessions needing a particular resource. This could be useful if you are producing an agenda for a particular team that manages some resources.
- Exclude sessions needing a particular resource.
- Filter by Date
- Only publish sessions in a date or dates. Useful if you are producing an agenda for a particular day.
- You can exclude a date or dates from your publication. Useful if you have dates for build up and tear down in your agenda.
- Filter by Track
- Only publish sessions in a particular track or tracks. Useful if you are producing separate agenda for separate parts of your event
- Exclude sessions on a particular track. Can be useful to block presenting of a track until a product launch has happened.
To configure filters:
- Click ‘Publish Agenda’
- Click on the name for your existing publication
- Click ‘Configure’
- Expand either the ‘Speaker Configuration’ or ‘Session Configuration’ section
- Expand the corresponding ‘Filter Speakers’ or ‘Filter Sessions’ sections and configure the filters you need
- Save and republish
How are Sub Sessions handled?
If you are using Sub Sessions the speaker will be shown as speaking on the parent session, rather than the sub session.
How can I publish automatically?
Warning
Consider your teams workflow as a team before enabling automatic publishing. When you enable automatic publishing there is a potential for the agenda to be published when you have content that is not ready for publication.
To schedule publishing scroll down to the ‘Scheduled Publishing’ part of the configuration.
You can then choose whether to publish once per hour, or once per day. If you choose to publish each day the publication will occur around 3am in the timezone of your event.
Still can’t find what you’re looking for? Email support@lineupninja.com and one of the team will get back to you as soon as possible.