Content Portal: General Setup
General setup information and configuration options that apply to both the Landing Page and Home Page of the Content Portal.
How do I set up the portal?
When you create a new event, the New Event dialogue box will ask you to provide the portal with a subdomain (the first part of the web link). This is the link that speakers and other contributors will use to access the portal:
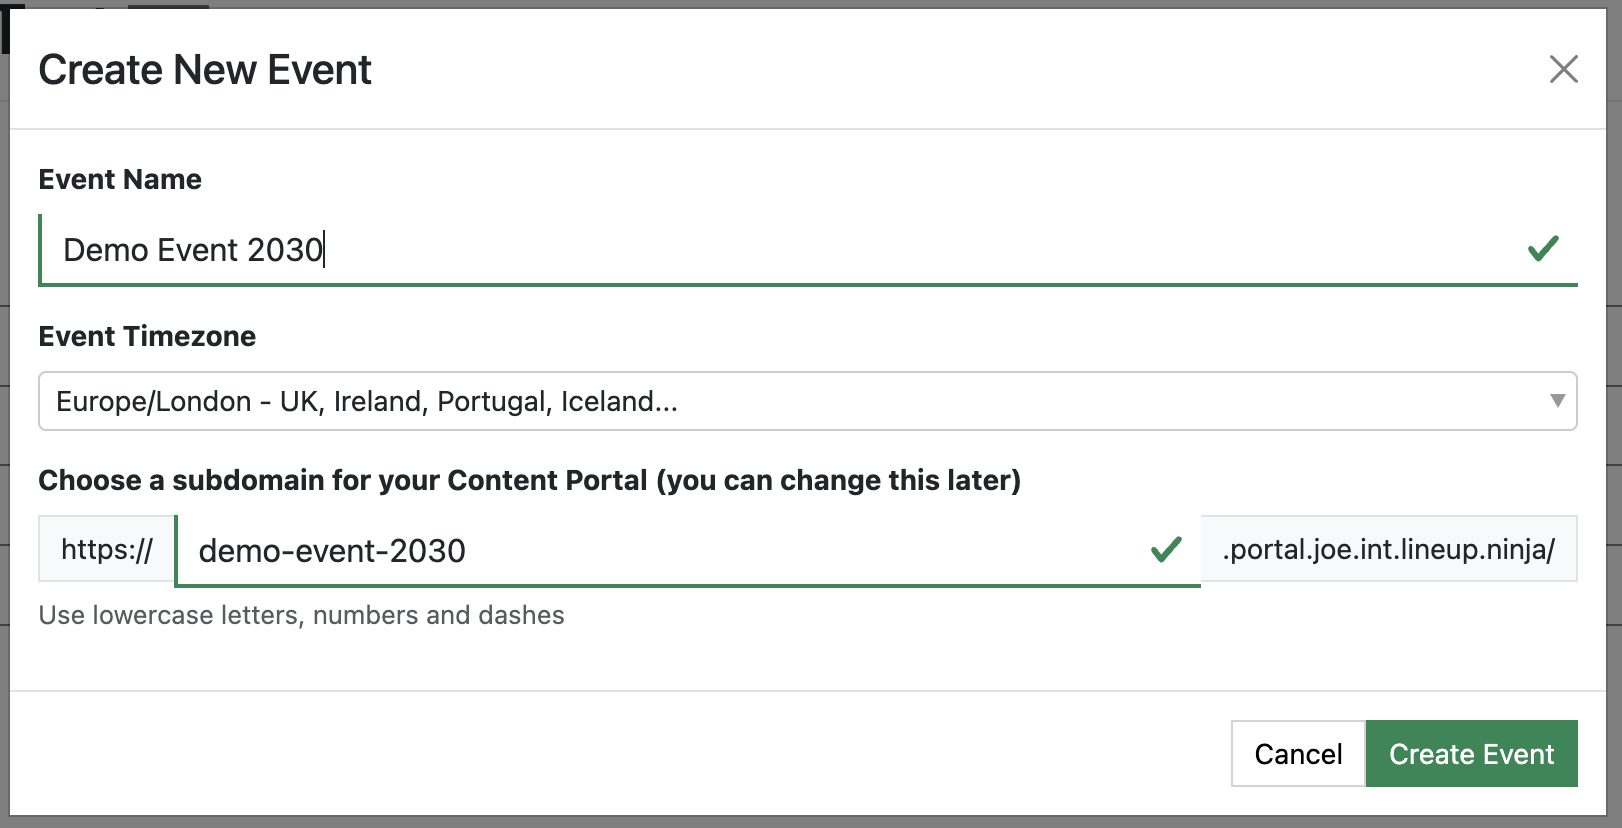
By default, the system will generate a subdomain based on the event name, but you can add your own custom subdomain.
Tip
The subdomain needs to be unique, so we recommend adding the year to the end of your event name or subdomain.
When you click “Create Event”, the portal will be created and published to this web address.
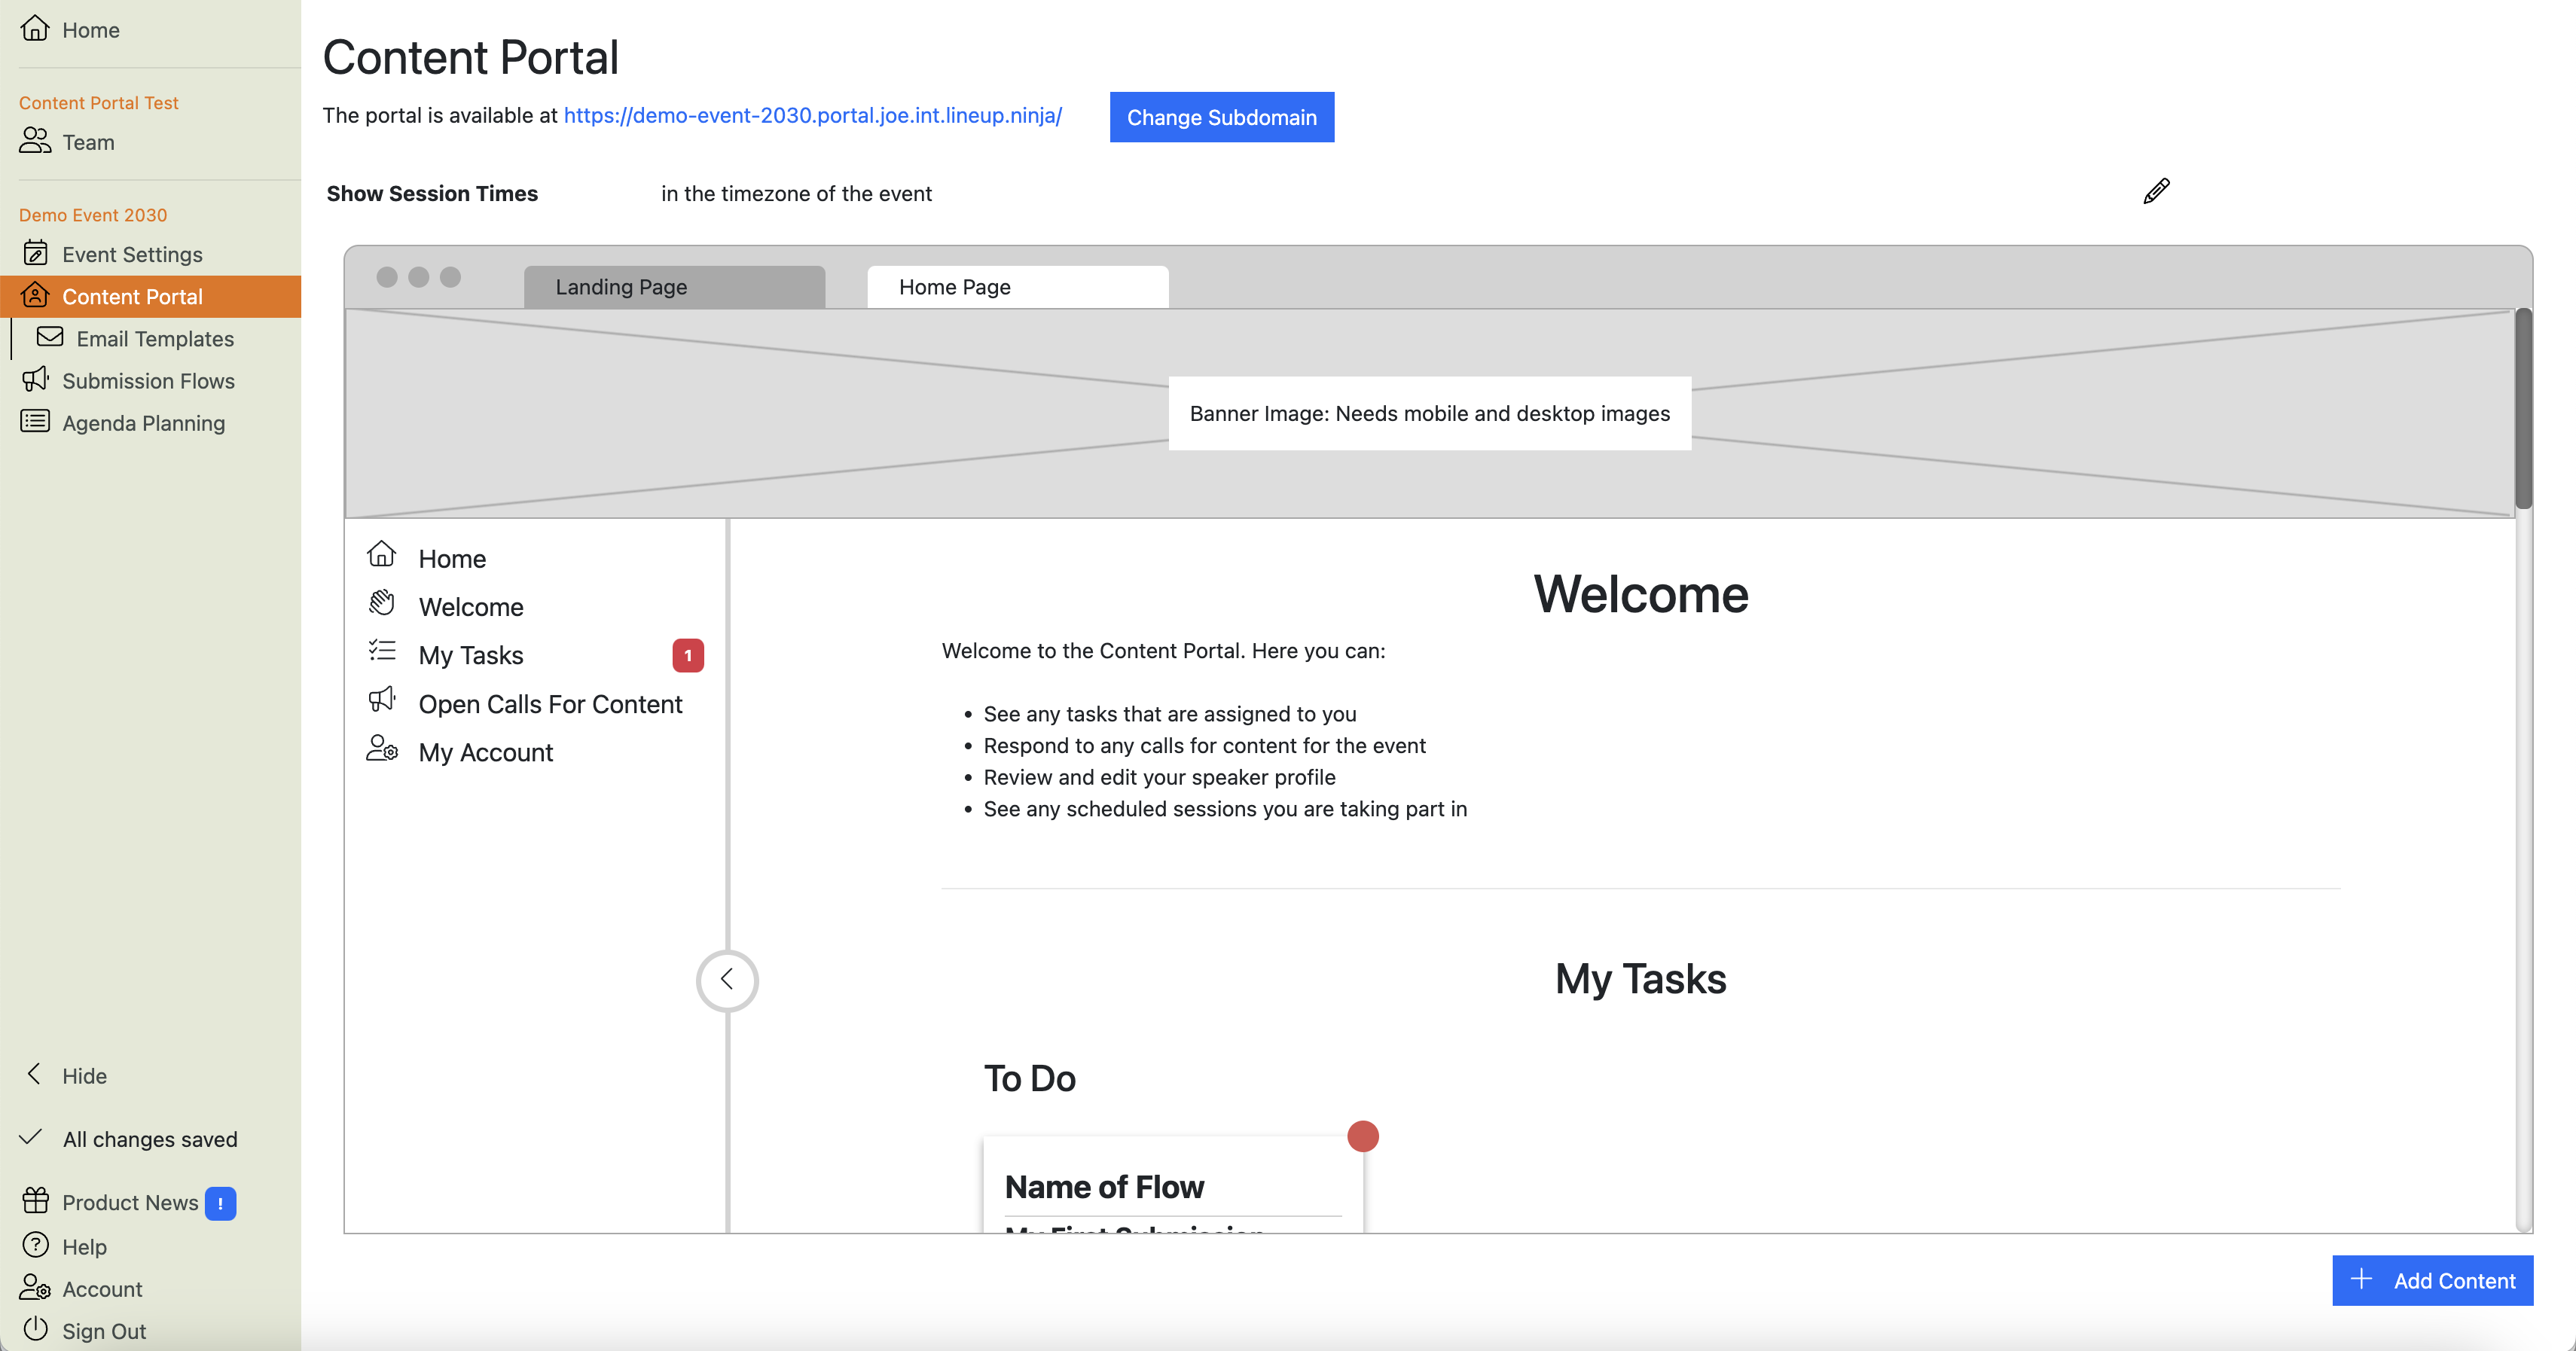
The portal’s address is stored at the top of the Content Portal’s configuration page.
Where can I find the Content Portal configuration?
Navigate into an event. You will see a link to the Content Portal in the left-hand menu:
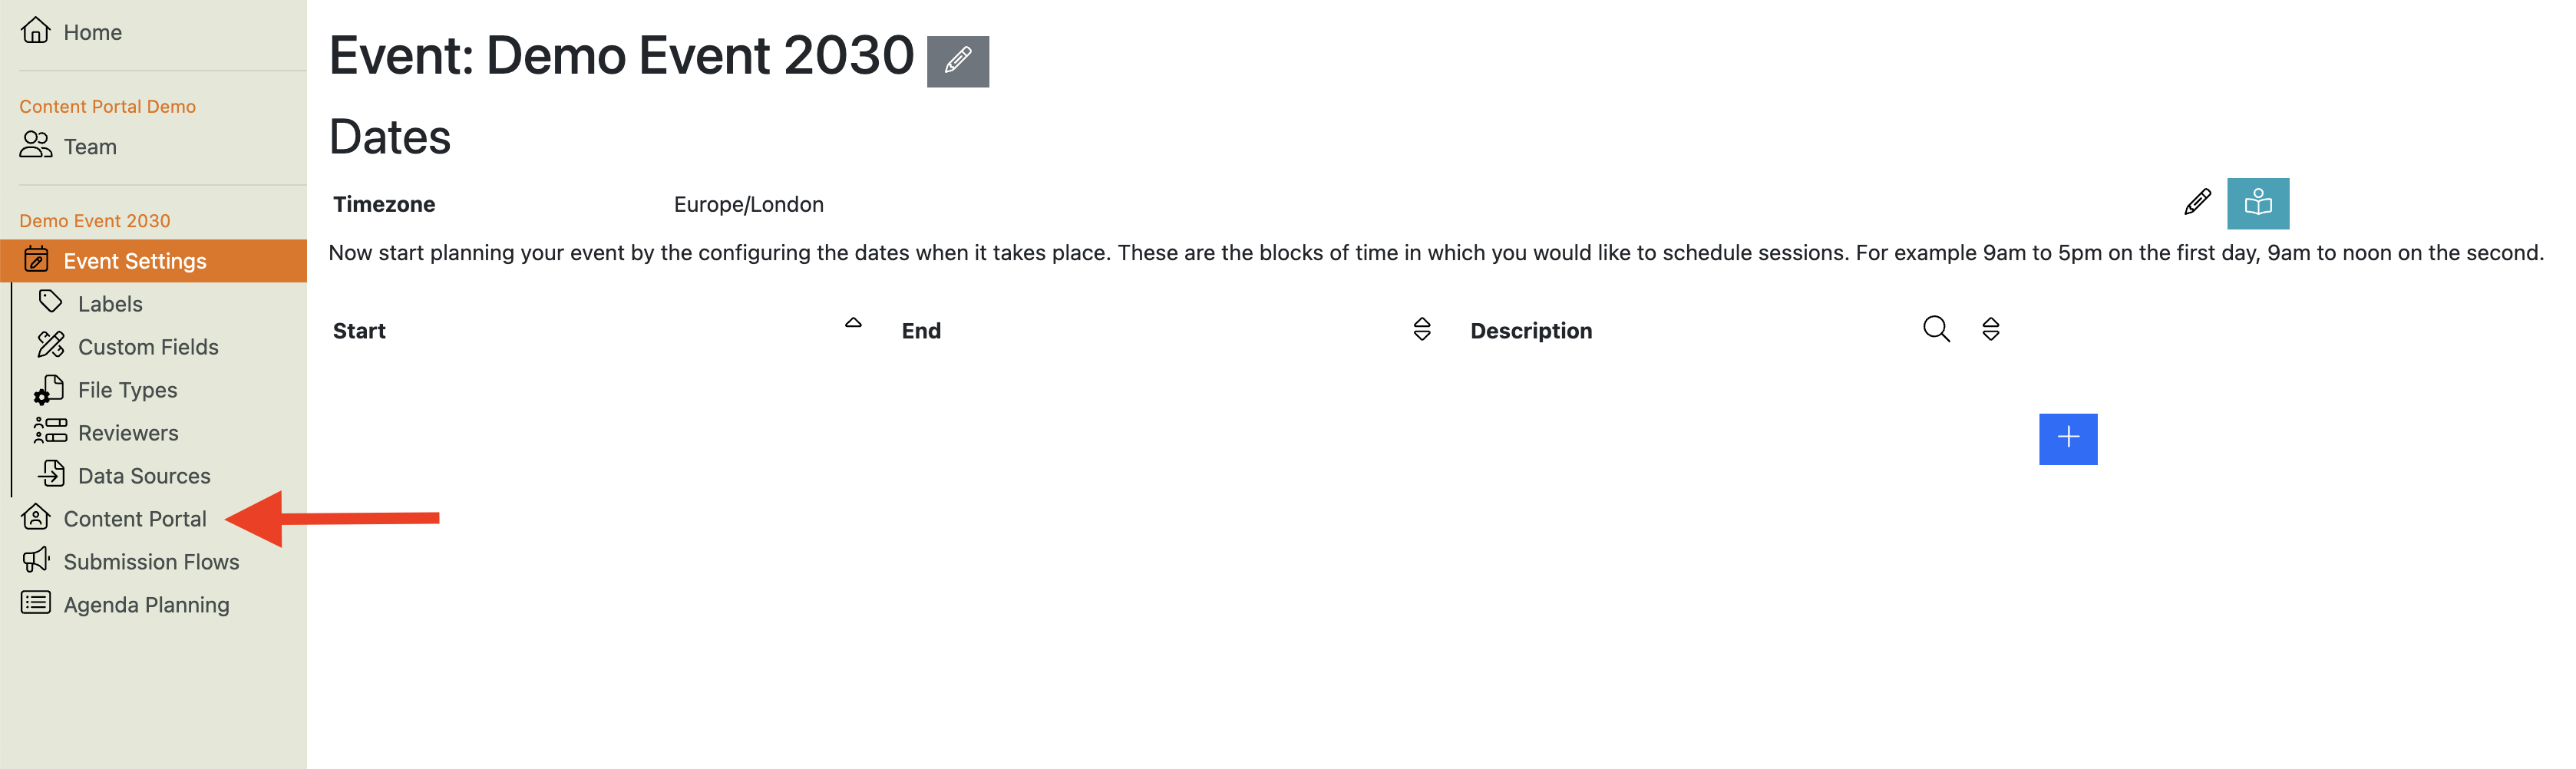
Click this link to bring up the Content Portal configuration view:
How is the Content Portal organized?
The portal has two main pages: the Landing Page and the Home Page.
Landing Page
This is the page that portal users will see when they arrive at the web link. You can use it as a simple “Welcome”, or to provide guidance for users before they log in to the portal.
Read more about how to configure the Landing Page here.
Home Page
This is the page that users will see once they’ve logged in. It can contain several sections that users can interact with. Read more about these sections and how to configure the Home Page here.
Tip
You can apply different branding to the landing page and the home page. For example, you can add a large, impactful banner image on your landing page and a smaller image on the home page to save space.
How do I add branding to the Content Portal?
Branding is added (in the form of banner images) to the top of the Landing Page and Home Page of the Content Portal.
You can add banners to these page (e.g. a larger, impactful image on the Landing Page and more space-efficient banner on the Home Page).
Each page also allows you to add two images: one for desktop and one for mobile devices.
How do I invite Speakers to the Content Portal?
-
Navigate to >
-
Click at the top right of the table to add a new Speaker
-
Fill out their first and last name, an email address and company name. If you have already input your Sessions, you can assign them to the Speaker here too

-
Click to save
-
Select the Speaker(s) you wish to invite to the Speaker Portal using the tick box on the left hand side
-
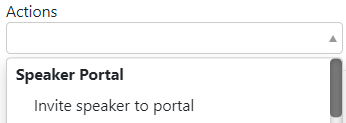
Open the ‘Actions’ menu at the top left of the table and select ‘Invite Speakers to Portal’
-
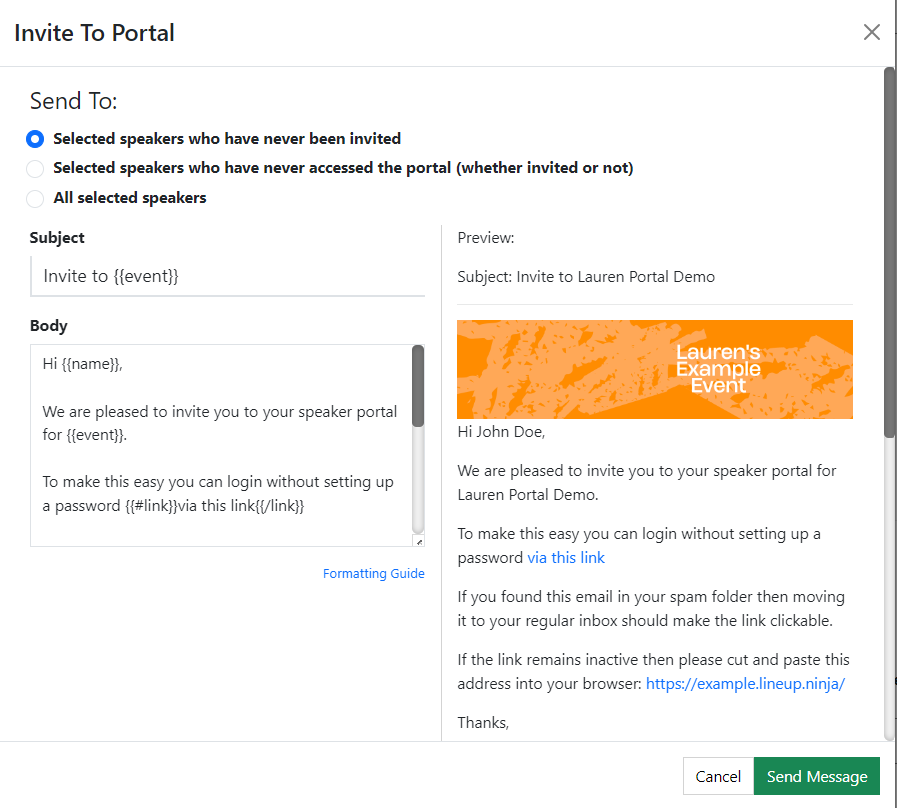
A popup will appear, containing the email that will be sent to the Speaker, in which you can select what group of people the email is sent to
Note
For more information about configuring and customising Email Templates and Branding, follow this link.
How do I see who has and has not been invited to the Speaker Portal?
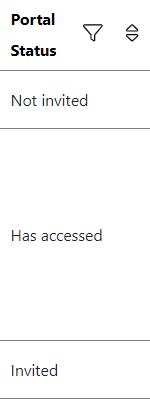
Within the Speaker List on , there is a column indicating the Portal Status for each Speaker:
- Not Invited - Speaker has not yet been invited to the Portal
- Invited - Speaker has been invited to the Portal but has not yet accessed it
- Has Accessed - Speaker has been invited to the Portal and has accessed it (logged in)
Tip
If the column does not appear, navigate into the settings by clicking on the Settings Wheel in the top right corner. Here you can hide/unhide columns using the Eye Icon.
How do I delete a Content Portal?
If your event has more than one Content Portal you can delete one of them. Deleting a portal does not delete its Submission Flows, tasks or Speaker Confirmation. They move to another Content Portal in the same event, and the deleted portal’s web address forwards there.
- Open the Content Portal configuration view for the portal you want to delete
- Scroll down past the portal preview to the “Delete Portal” section at the bottom of the page
- Click the red “Delete Portal” button
- Read the summary of what is about to happen
- Choose the Content Portal that the content should move to. If the event has only one other configured Content Portal, that portal is used and is named for you, so there is nothing to choose
- Type the portal’s name in the confirmation field
- Click the red button at the foot of the form. It is labeled “Delete” followed by the name of the portal
When the deletion finishes you are taken to the portal the content moved to.
Note
You may see one or two warnings before you confirm. Neither of them stops you continuing.
- One lists any published or invite-only Submission Flows in the portal, by name, because submitters may be using them right now
- The other appears when the two portals show session times differently — one in the timezone of the event, the other in the timezone of the user’s browser. No deadline itself changes, but your submitters will see every date and time differently
Warning
Deleting a Content Portal cannot be undone. The portal’s own content — its Landing Page and Home Page sections, its banner images and its email templates — is deleted along with it.
What moves when I delete a Content Portal?
These all move to the portal you choose:
- Submission Flows
- Speaker Tasks
- Session Tasks
- Speaker Confirmation
They all go to that one portal. You cannot send different flows to different portals, and you cannot choose to leave something behind. This is because a Submission Flow published in a Content Portal has no web address of its own — the portal’s address is the only way in — so it has to live in the portal that the old address now forwards to.
Moved Submission Flows are added after the flows already in the destination portal, so the order of the flows already there does not change.
Nothing is added to the destination portal. Its Landing Page and Home Page sections stay exactly as they are.
Note
Emails about the moved Submission Flows, tasks and Speaker Confirmation will come from the destination portal’s address and use its email templates, not the deleted portal’s.
Why can’t I delete a Content Portal?
There are two reasons the deletion may not be offered, or may be refused.
There is no other portal to move the content to
The last Content Portal of an event cannot be deleted. Deleting it would turn the Content Portal off for the whole event, which is not what this action does. When an event has only one Content Portal, the “Delete Portal” section is not shown at all.
The portal you move the content to also has to have an address of its own. If the event’s other Content Portals do not have one yet, there is nothing to move the content to, and you are asked to add and configure another portal first.
The destination portal has nowhere to show the content
Content that moves is only visible if the destination portal has a section that displays it:
- Submission Flows are displayed by a Submission Flows section, which appears on the Home Page as Open Calls for Content
- Speaker Tasks, Session Tasks and Speaker Confirmation are displayed by a Speaker Tasks section, which appears on the Home Page as My Tasks
If the destination portal does not have a section that the content moving into it needs, the deletion is refused and the message names the section that is missing. There are two ways forward, and either is fine:
- Add the missing section to the destination portal’s Home Page, or
- Remove that content from the portal you are deleting, before you delete it
Lineup Ninja will not add the section for you, because that would change the way the destination portal looks without you asking for it.
What happens to the deleted portal’s web address?
The old address keeps working, and forwards to the portal the content moved to. This applies to every kind of link into the portal: bookmarks, links in emails you sent weeks ago, and the unlock links for invite-only Submission Flows. An unlock link for a flow that is moving still grants access after the deletion.
Everyone arrives at the front of the destination portal, whichever page the old link pointed at. A link to a particular page within the old portal does not carry across.
Submitters will be asked to log in again. A login only applies to the address it was made on, so someone who was signed in to the old address arrives at the new one signed out. For most people this is a single magic-link email.
Warning
The deleted portal’s address stays reserved, and can never be used again — not by this event, and not by any other event or team.
The address has to stay claimed in order to keep forwarding. If it were released, every link your submitters already have would stop working.
If you try to give another portal in the same event the deleted portal’s address, Lineup Ninja will refuse and will tell you which portal that address now forwards to. From any other event, the address simply reports as already in use.
So if you expect to reuse an address — for next year’s event, for example — do not delete the portal that holds it and expect to get the address back. You will not.
Still can’t find what you’re looking for? Email support@lineupninja.com and one of the team will get back to you as soon as possible.